The Abode Motion Sensor uses advanced algorithms to ensure exceptional performance in sensitivity, reliability, and false alarm immunity. Once installed--and your system is armed--when movement is detected, the device will be triggered and transmit an alarm signal to the Abode Hub for processing and quick alerts via the Abode App. With adjustable sensitivity you can take complete control over home security needs and protect an entire room with one device.

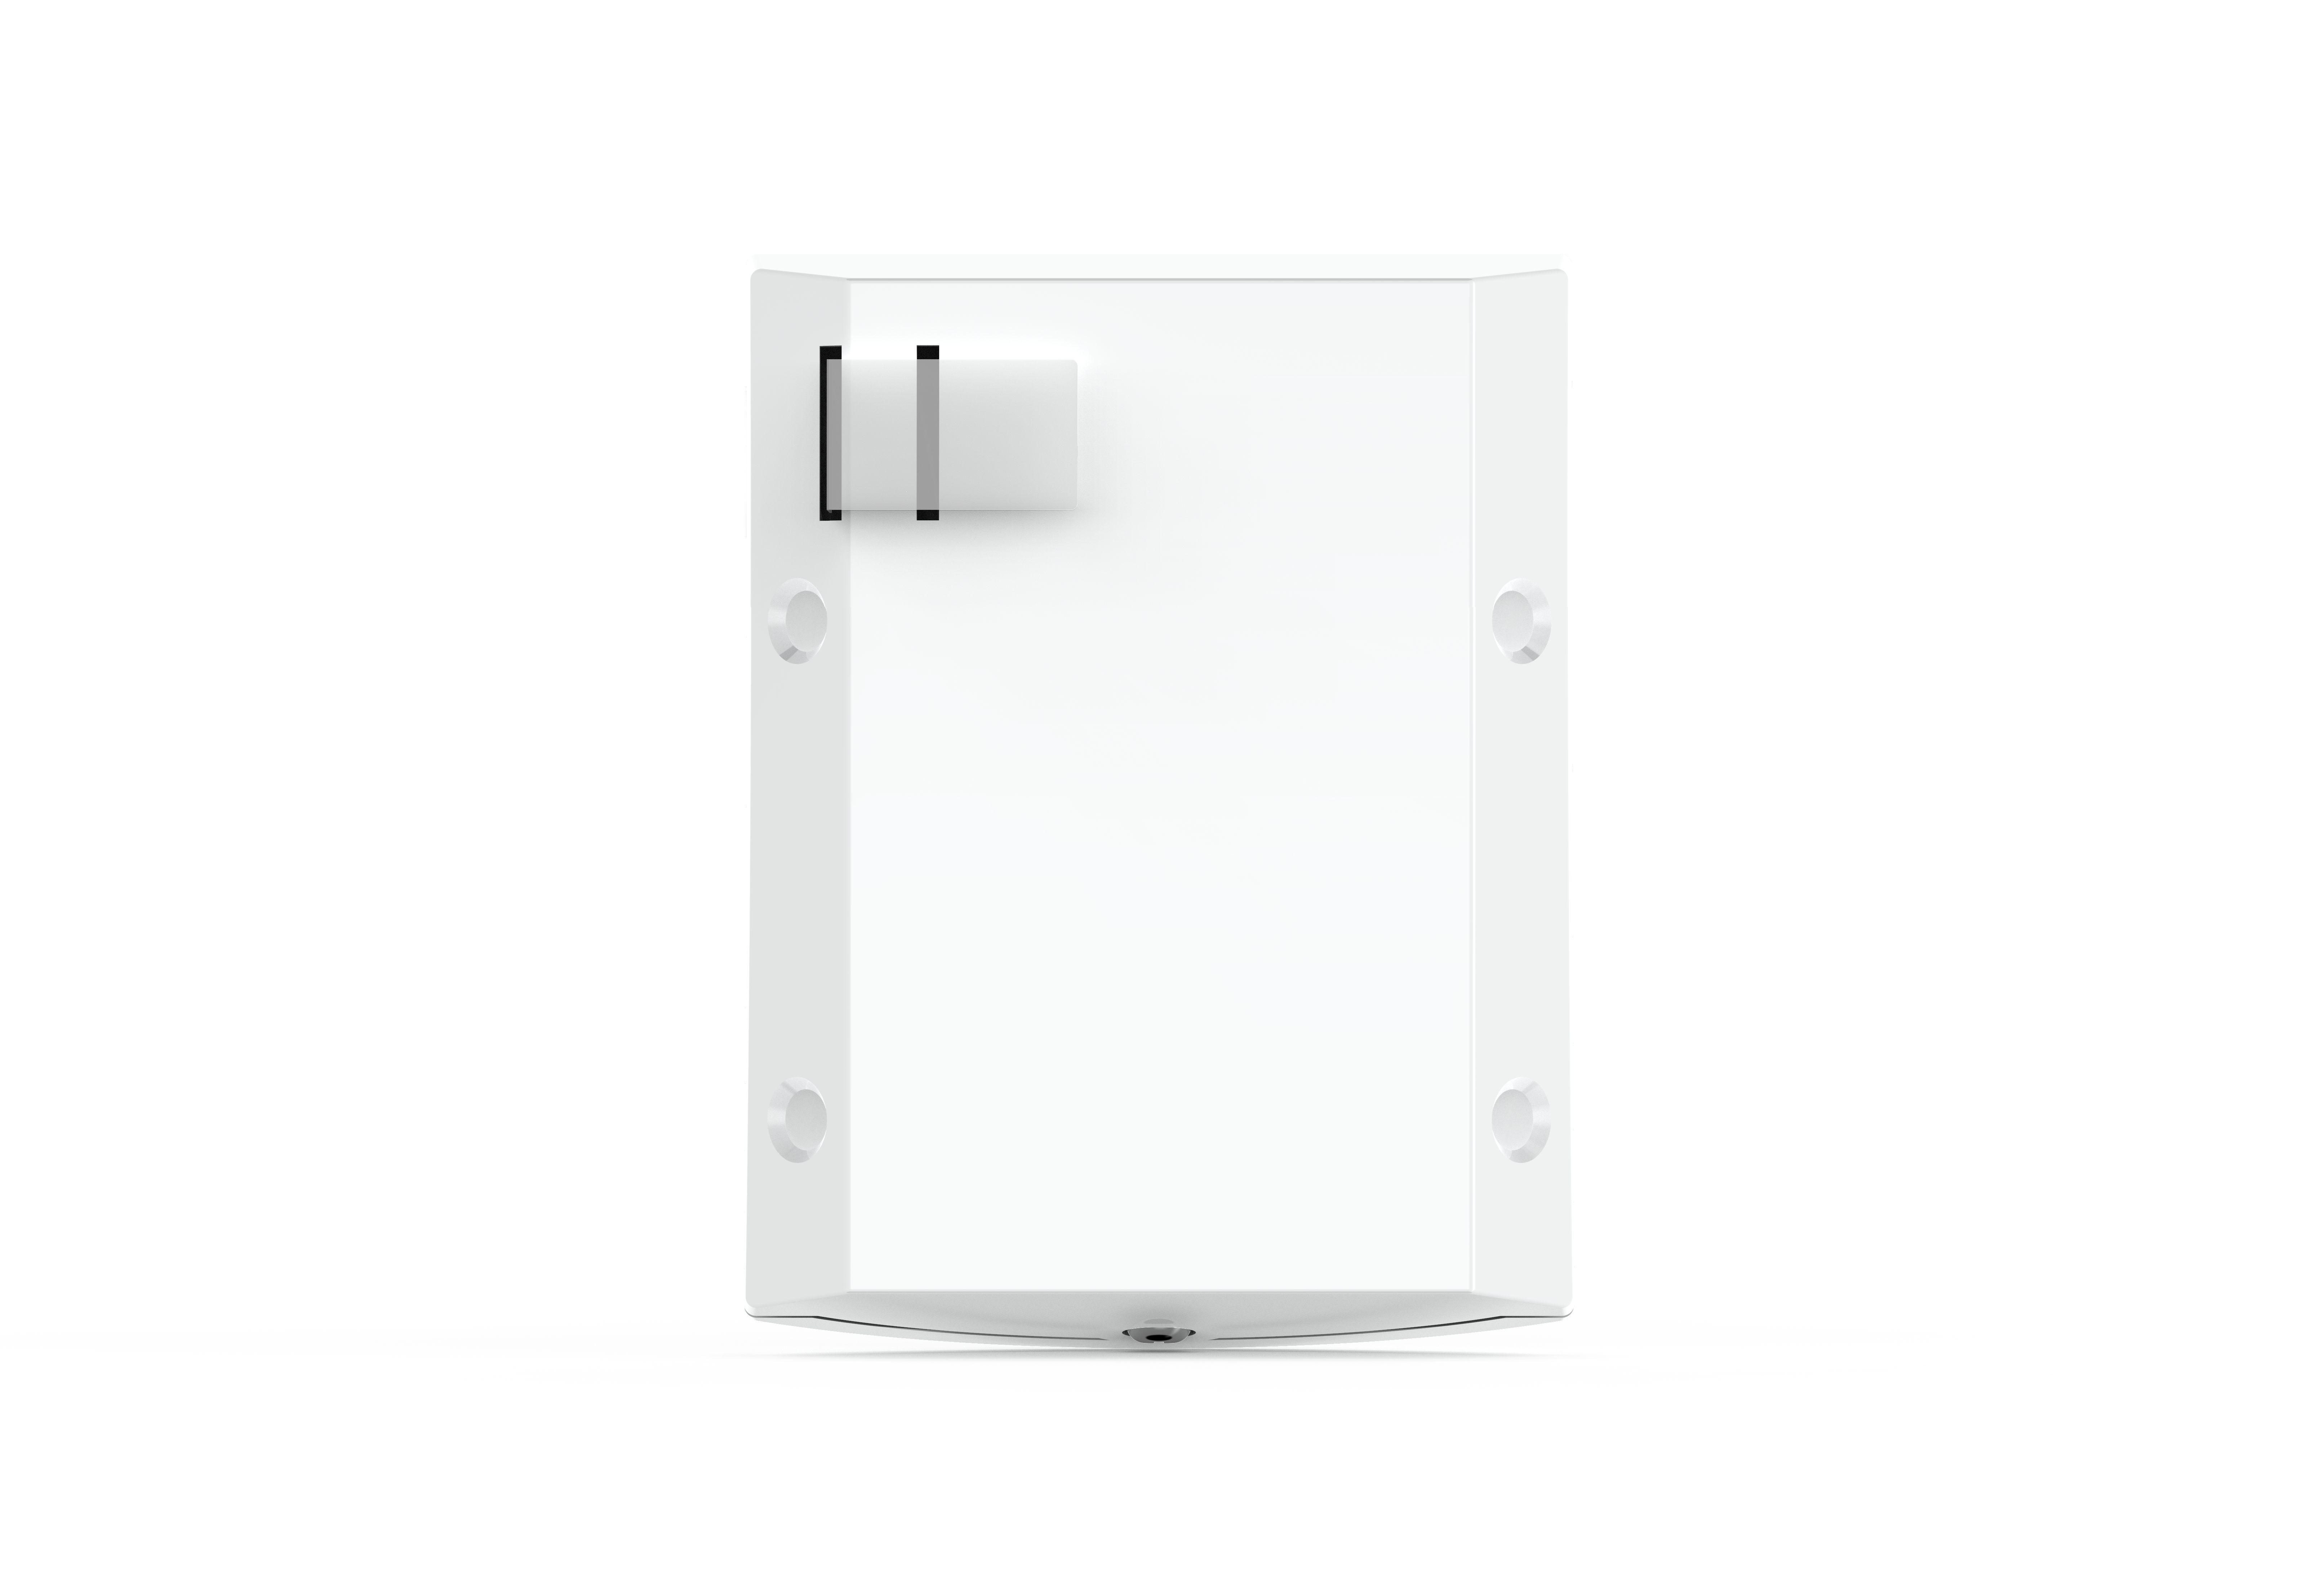
Parts Overview

1. Battery Tab
2. Pairing/Test Button & LED Status Light
3. Sensor Lens
4. Knockout Points
5. Back Cover
6. Enclosure Screw
Motion Sensor Settings
You can configure the Motion Sensor to act in different ways for both Home and Away Mode, depending on what your requirements are
Inactive - the Motion Sensor is inactive, and motion will not trigger an alarm.
Active after countdown timer - the Motion Sensor will count down the entry timer when motion is detected, and then trigger an alarm
Countdown on Door Sensor - the Motion Sensor will count down the entry timer when motion is detected, and then trigger an alarm, but ONLY if a door sensor has been opened prior. If motion is detected without a door sensor being opened, then an alarm will trigger immediately on motion being detected
Active Immediately - an alarm will be triggered immediately on motion being detected
LED Status Light Guide
LED Status Light Guide
In normal operation the LED Status Light remains off except in the following situations:
When the enclosure is opened and the tamper switch is triggered the LED will light up for 2 seconds to indicated it is transmitting a "tamper" signal to your Abode Hub.
When the sensor is in Test Mode the LED will light up every time a movement is detected. Learn more about Test Mode at the bottom of Pairing Guide in the drop-down below.
Pairing Guide
Pairing Guide
1. Make sure you have the latest version of the Abode App installed on your mobile device. In the Abode App on your iOS or Android device, select the Menu (≡).
2. Tap "+ Add Device" from the list.

3. Tap "Motion Sensors".

4. Tap "Indoor Motion Sensor (No Camera)".

5. Have the sensor unboxed and ready to set up. Remove the clear plastic battery tab from the back of the device, then tap "Continue".

6. When the red LED on the front of the device stops blinking press the Pairing/Test Button on the front of the Motion Sensor one time. When the device is added successfully a green checkmark will show next to the discovered device in the app.


7. The next page will ask that you name your new sensor, then your Motion Sensor will be paired and ready to use.

8. Steps 4 and 5 share installation tips to assist in a quick and easy mounting of your new sensor.


Test Mode (optional)
Use this mode to test the wireless range of your Motion Sensor and mounting location(s) before committing to installation. To enter the test mode, press and release the Pairing/Test Button on the front of the sensor once. The motion camera will warm-up for 1 minute. Leave the room while it is warming-up and do not trigger the device during this warming-up period. After the warm-up period, you can trigger motion camera by walking in front of it to check motion detection range. If motion is detected, the Status LED will light up for 2 seconds.
For live testing, arm the system into the Away mode and leave the room so the sensor cannot detect you. Wait for the system to fully arm. The Motion Sensor will wake-up 1 minute after the system has fully armed. After the warm-up period, you can trigger motion camera by walking in front of it to check motion detection range. If motion is detected, the alarm should trigger immediately. Disarm the system to complete testing.
Installation Guide
Installation Guide
NoteThe Motion Sensor is not pet immune and will be triggered by pets. Please note that the performance of the sensor is impacted by external factors such as the height of detect objects, desired detection range, installation area, etc.Installation Tips
The suggested mounting height is 6.5 ft above the ground.
Mount where animals cannot come within the detection area, and don’t aim the sensor at stairways animals will be using.
Mounting the sensor in a corner will provide the widest view.
Mount the sensor in an area that is not obstructed by curtains, ornaments, etc.
Avoid pointing the sensor directly at sources of heat (e.g. fireplaces or heating vents), or in direct sunlight.
The sensor is designed to be mounted on either a flat surface or in a corner situation with the included adhesive tape or mounting screws. The base has Knockout Points, where the plastic is thinner, for mounting purpose. Two knockouts (visible on the inside of the sensor with the Back Case removed are for mounting the sensor on a flat surface (like a wall), while the four knockout points (visible from the outside back of the sensor) are for corner mounting the device. Included adhesive mounting tape also serves as a quick and secure way to mount the Motion Sensor.
Make sure the Battery Tab has been removed from the device and it is paired to your Abode hub already. Refer to the Pairing Guide in the drop-down above to pairing instructions. Once you select a place to mount the sensor, first open the Abode App to confirm the sensor is still within range of the Hub and is detecting motion.
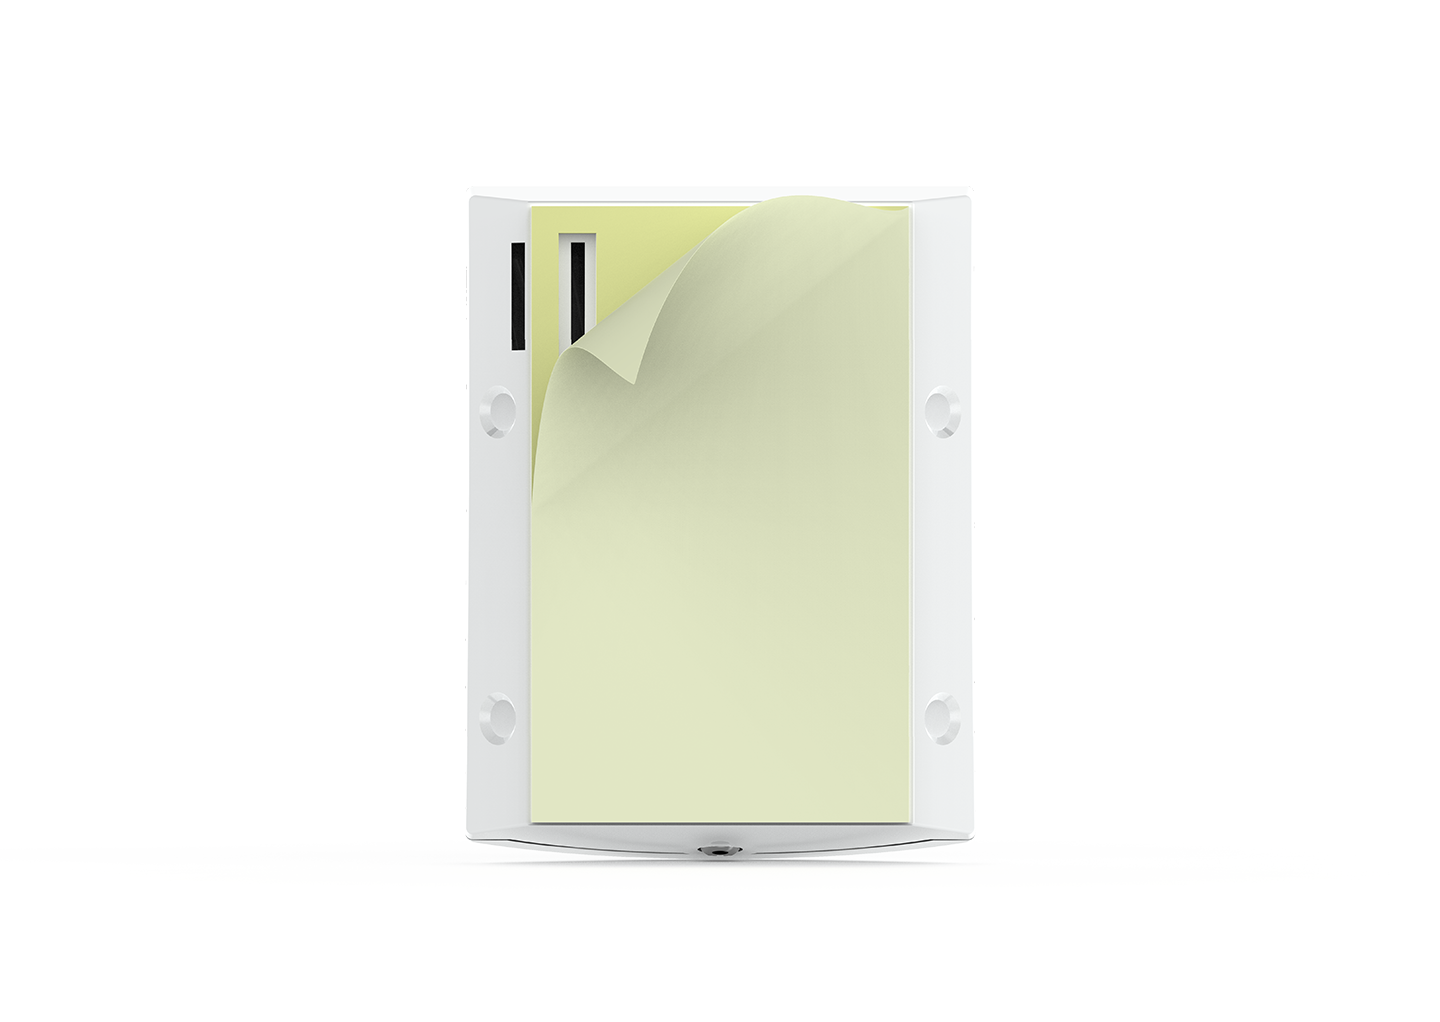
Motion Sensor Back Case With Battery Tab
Using included adhesive mounting tape: If mounting the Motion Sensor on a flat wall, used the large rectangular mounting tape.
First, remove the wax paper from one side and apply the adhesive to the Back Cover of the sensor, pressing I firmly into place.
Next, remove the other side of wax paper and firmly press the sensor onto the desired wall. Apply pressure for several seconds to ensure the device will adhere securely.
Flat Wall Adhesive Tape
If installing the sensor in a corner, use two of the included thin strip adhesives and apply them to the chamfered corners of the Back Cover of the sensor, then install the sensor firmly to the corner of two walls. Apply pressure for several seconds to ensure the device will adhere securely.
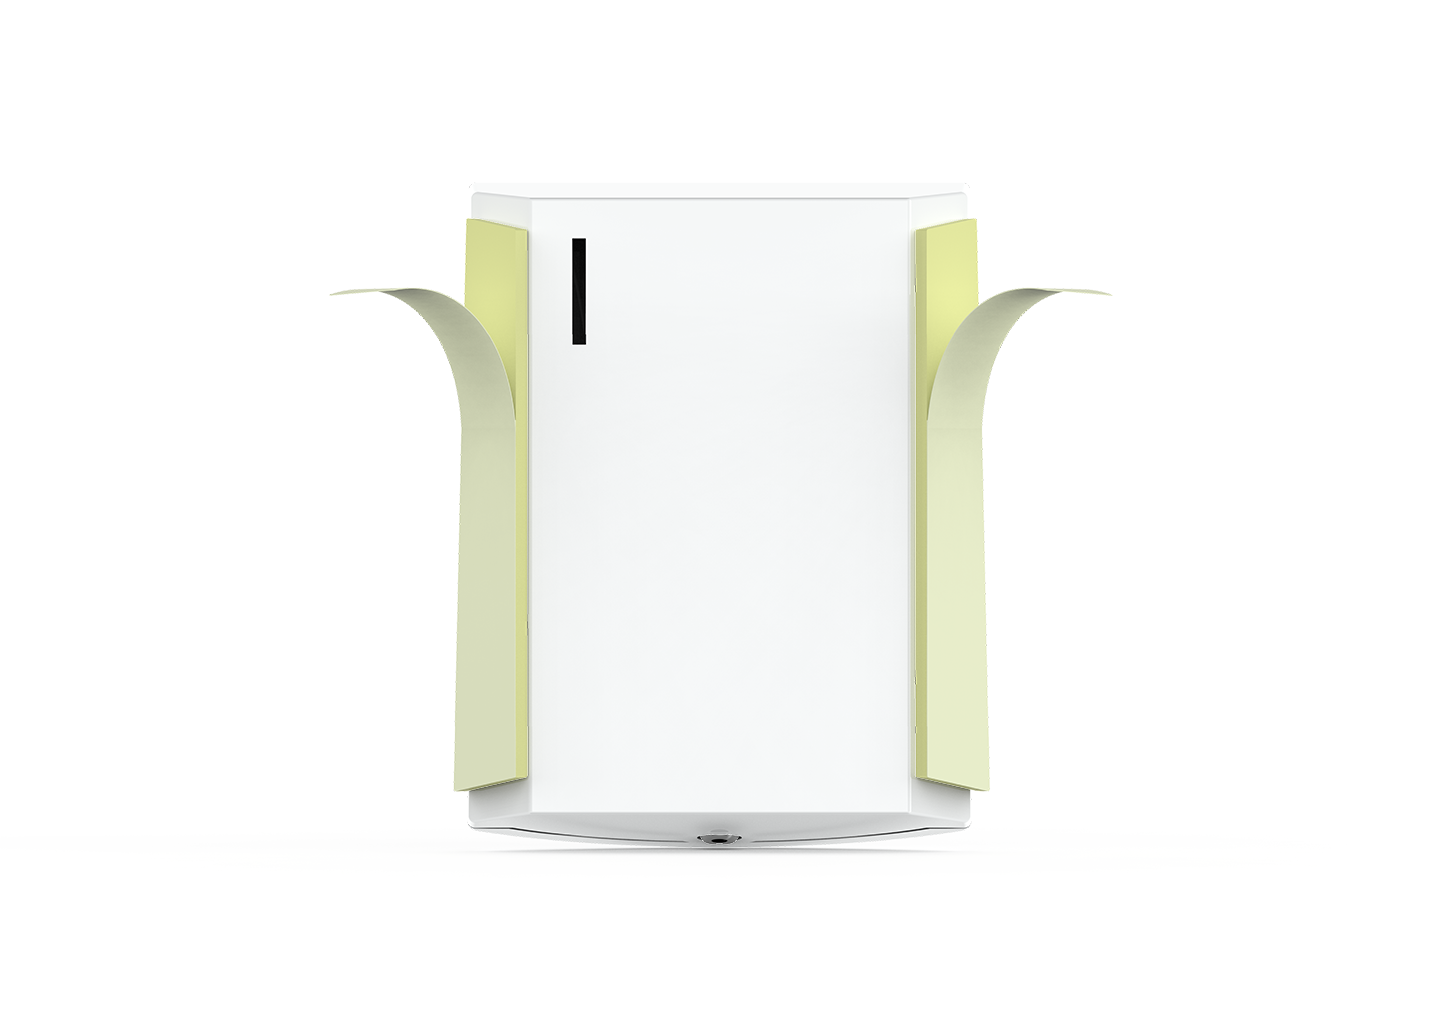
Corner Mount Adhesive Tape
Using included mounting screws: Alternatively, the sensor can be mounted with screws. The sensor Back Cover has Knockout points where the plastic is thinner, allowing for screws to be drilled through the plastic.
Loosen the single Enclosure Screw on the bottom of the Motion Sensor, then remove the Back Cover by separating the two halves.
Once your desired mounting location has been found, hold the Back Case in your desired mounting location, and with a drill equipped with a Philips drill bit, drill the mounting screws through the knockout points and into the wall.
If needed for softer materials such as drywall, use the included wall anchors to ensure the sensor is mounted securely.
Reinstall the sensor onto the wall mounted Back Case, then secure the Enclosure Screw at the bottom of the sensor. Be cautious to not over-tighten this screw.
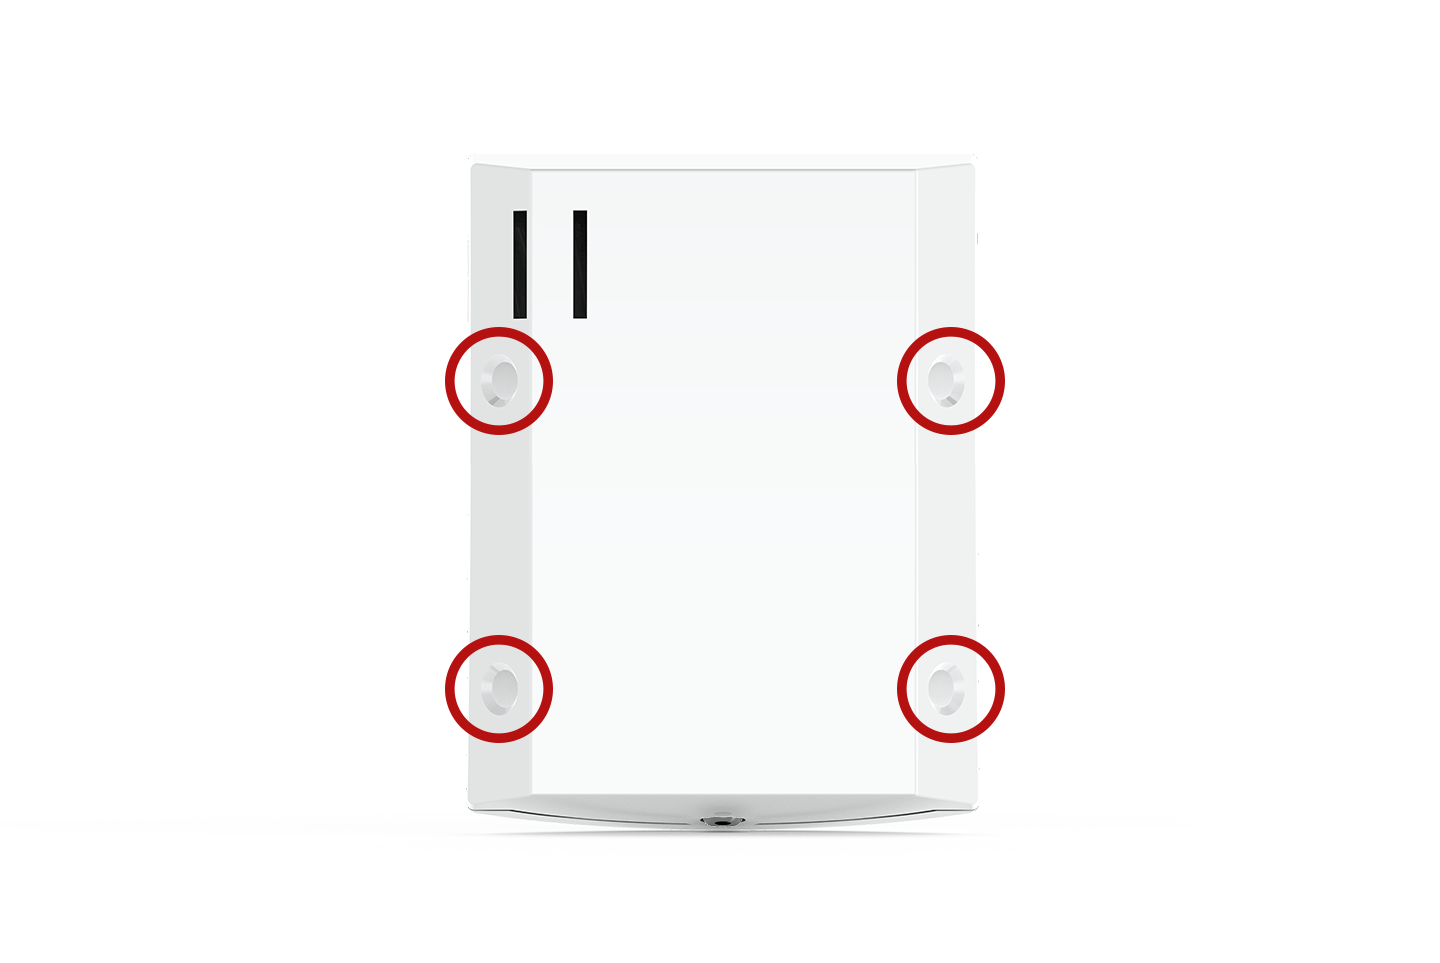
Four Knockout Points (Circled)
Installation Example

Battery Guide
Battery Guide
The Motion Sensor uses two AA Alkaline batteries. Older models of the device use one 3V CR123 lithium battery. Low battery detection occurs about one month before complete exhaustion. The batteries come pre-installed in the sensor and should be activated before pairing and setup by pulling the plastic battery tab.
The sensor has an estimated battery life of up to 5 years under normal operating condition and is capable of detecting low battery. When the battery is low, a low battery signal will be sent to the Abode Hub and you will receive a notification in the Abode App. The Motion Sensor operating temperature range is 14° to 113° F.
Changing the Battery
Note
After the battery has been removed, press the Pairing/Test button 5-6 times to fully discharge before inserting the new battery
Make sure the batteries are installed in the correct dimensions. Refer to the "+" and "-" polarity guide inside the sensor.
Use a Philips head screwdriver to loosen the enclosure screw at the bottom of the Motion Sensor.
Separate the two parts of the sensor enclosure by puling them apart at the bottom.
Remove the two AA batteries and replace with the batteries. High quality alkaline batteries are recommended for the best performance and longevity.
To replace the cover, join the two parts of the sensor enclosure together at the top fitting first, then join at the bottom as well.
Re-tighten the bottom enclosure screw, and re-install the Motion Sensor in your home.
Tech Specs
Tech Specs
Size & Weight
3.51 x 2.64 x 2.09"
Weight: 4.5oz (with batteries)
Connectivity & Integrations (Abode Hub required)
AbodeRF (433Mhz)
Apple HomeKit, Amazon Alexa, Google Assistant, CUE automations
Power
Battery: 2x AA alkaline (pre-installed, replaceable)
Expected Battery Life: Up to 5 years
Environmental
Not rated for outdoor use
Operating Temperature: 14° to 113° F
Operating Humidity: Up to 85% non-condensing
Certifications
FCC, CE, IC, NOM